<< First < Previous | Intro 1 2 3 4 5 | Next > Last >>
Back to Table of Contents
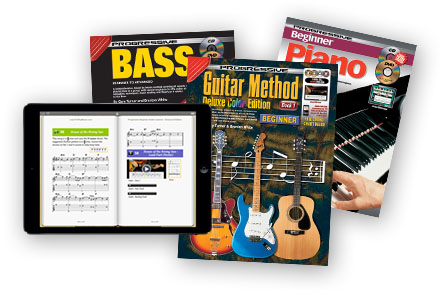
Progressive Beginner Guitar assumes you have no prior knowledge of music or playing the guitar.
Starting from the types of guitar available and the different styles of playing, you are introduced to:
- Important basic chord shapes and chord progressions.
- Learn to read and play guitar music using standard music notation, easy read tab and easy read strumming patterns and chord diagrams.
- Learn to play the notes on all six strings.
- Learn the melodies and chords of over 20 well known songs and chord progressions including Rock, Blues and Turnaround Progressions.
- Learn basic music theory including time signatures, sharps and flats, major scales, etc.
- Learn the most common open chord shapes in the keys of C major, G major and A minor.
The book also has special sections on tuning and how to read sheet music of your favorite music artists and groups.
All guitarists should know all of the information contained in this book.
The best and fastest way to learn is to use this book in conjunction with:
- Buying sheet music and song books of your favorite recording artists and learning to play their songs.
- Practicing and playing with other musicians. You will be surprised how good a basic drums/bass/guitar combination can sound, even when playing easy music.
- Learning by listening to your favorite recordings.
Also in the early stages it is helpful to have the guidance of an experienced teacher. This will help you keep to a schedule and obtain weekly goals.
Using The Enhanced Features
This enhanced eBook contains video and audio recordings for all exercises. The book explains where to put your fingers and what techniques to use, while the video and audio lets you see and hear how each example should look and sound when played correctly.
Practice the examples on your own, playing slowly at first. Then try playing to a metronome set to a slow tempo, until you can play the example evenly and without stopping. Gradually increase the tempo as you become more confident and then you can try playing along with the recordings.
To play along with the video and audio your instrument must be in tune with it (see Tuning Your Guitar).
A purple bar with a play icon and an exercise number indicates a recorded example like this:
Each enhanced exercise includes:
Video
Watch a close up of the example being played by a professional teacher so you can check your technique and hear how the example should sound when played correctly.
Click the play icon (triangle) to start the video playing and then click the full screen icon (2 arrows) to expand the video to fill the screen. A band is performing with the teacher so you can hear how the exercise sounds when played together with other instruments. Drag the slider to watch different parts of the exercise again. Please note that the video is best viewed in landscape orientation.
Solo Track
Listen to the example played by itself so you can focus on the part you are learning. Click the play icon (triangle) to start the audio playing. Drag the slider to hear different parts of the exercise again.
Backing Track
When you are comfortable playing the exercise, use this audio to practice playing along with the backing band by yourself. Click the play icon (triangle) to start the audio playing. Drag the slider to hear different parts of the exercise again. Adjust the volume of your instrument and the recording so that you can hear yourself and the band at the same time.
Full Page Score
For longer examples, the music score for the exercise is available as a single image for easy viewing. Double-tap the image to open it full screen and then use your fingers to swipe up and down or zoom in and out. Please note that you can have the audio playing and the full page score open at the same time.
Acoustic Guitars
Classical Guitar
The classical guitar has nylon strings and a wider neck than the other types of guitar and is played with the fingers of the right hand rather than a pick. It is most commonly used for playing Classical, Flamenco and Fingerstyles. Generally it is much cheaper than other types of guitar and is recommended for beginning guitarists due to the wider fretboard, making it easier to play and the nylon strings being gentler on beginner fingers.
Know Your Guitars…
The Classical Guitar
As the name suggests, this type of guitar is used for classical music, but it is also commonly used for Flamenco, Folk, and World music. Some of the most famous classical guitarists are Andres Segovia, John Williams and Alirio Diaz. American fingerpicker Chet Atkins used an electric classical guitar.
Steel String Acoustic
The steel string acoustic has steel strings and is most commonly played by strumming or fingerpicking groups of notes called chords. This is the type of acoustic guitar you will hear in most modern styles of music, e.g., Top 40 Rock and Pop music.
Acoustic guitars can be amplified for performances at large venues where the acoustic guitar needs amplification to be heard by using a microphone placed near the soundhole or by placing a portable pickup on the body of the guitar.
Know Your Guitars…
Acoustic Cutaway
As well as the standard acoustic guitar, there is another version called a Cutaway, where part of the body of the guitar is cut back and reshaped along the side of the fretboard. This makes it easier to play notes high up on the fretboard, which is great for playing lead solos on an acoustic guitar. Many players who switch frequently between acoustic and electric prefer to use an acoustic cutaway.
Electric Guitars
Electric guitars have pickups (a type of in-built microphone) and need to be plugged into an amplifier (amp) to be heard.
Solid Body Electric
The solid body electric is commonly used in Metal, Rock, Blues and Pop Music. Famous solid body electric guitars are the Fender Stratocaster the Fender Telecaster and the Gibson Les Paul.
Know Your Guitars…
Fender Stratocaster
The Fender Stratocaster is one of the most famous of all electric guitars. Designed by Leo Fender and first released in 1954, the Stratocaster (commonly called a “Strat”) has been used by millions of guitarists all over the world. Some of the most famous Strat players include Jimi Hendrix, Mark Knopfler and Eric Clapton.
Know Your Guitars…
The Fender Telecaster
This classic solid body electric guitar is used extensively in Country music and is also popular with Rock, Pop, Soul, Funk and Blues players. It is capable of producing a variety of sounds from clear bell like tones to stinging attacking sounds. Equally effective for both Rhythm and Lead guitar, the Telecaster has been favored by players like James Burton (who played with Elvis Presley), Muddy Waters, Albert Lee and Roy Buchanan.
Know Your Guitars…
Gibson Les Paul
Along with the Fender Stratocaster, the Gibson Les Paul is one of the most famous of all electric guitars. It is great for heavy Rock sounds as well as being versatile enough for Blues and Jazz. This guitar was made specially for Les Paul – a great Jazz player who also invented multi-track recording. This technique is essential for recording and is now used by everyone from top recording studios to musicians using computers at home.
Hollow Body Electric
The hollow body electric (semi-acoustic) is most commonly used in Jazz and Blues music. A famous hollow body electric guitar is the Gibson 335.
Know Your Guitars…
Gibson 335
Many Blues and Jazz players favor hollow body electric guitars for their full, rich tone. One of the most famous hollow body electrics is the Gibson 335. It has been used by players like Freddy King, Magic Sam and Larry Carlton. BB King had a model called the 345 specially designed for him. His guitar is named Lucille.
Know Your Guitars…
Dobro
The Dobro is a metal bodied “Resonator Guitar”. It has a resonator cone which amplifies the sound even though there are no electronics involved. There are also wooden bodied guitars with a metal resonator cone. All of these guitars are great for slide and fingerpicking. They are traditionally associated with Blues, Bluegrass, Country and other Roots music.
Strings
It is important to have the correct set of strings fitted to your guitar, especially if you are a beginner. Until you build enough strength in your hands to fret the chords cleanly, light gauge or low tension strings are recommended. A reputable music store which sells guitar strings should be able to assist with this. Do not put steel strings on a classical guitar or it will damage the neck of the guitar. It is important to change your strings regularly, as old strings are more difficult to keep in tune.
Approach to Practice
From the beginning you should set yourself a goal. Many people learn guitar because of a desire to play like their favorite artist (e.g., Eric Clapton), or to play a certain style of music (e.g., Rock, Blues etc). Motivations such as these will help you to persevere through the more difficult sections of work. As you develop, it will be important to adjust and update your goals.
It is important to have a correct approach to practice. You will benefit more from several short practices (e.g., 15-30 minutes per day) than one or two long sessions per week. This is especially so in the early stages, because of the basic nature of the material being studied. In a practice session you should divide your time evenly between the study of new material and the revision of past work. It is a common mistake for semi-advanced students to practice only the pieces they can already play well. Although this is more enjoyable, it is not a very satisfactory method of practice. You should also try to correct mistakes and experiment with new ideas. It is the author’s belief that an experienced teacher will be an invaluable aid to your progress.
Styles of Playing Guitar
The guitar is the most versatile musical instrument and can be used to play virtually all music styles including Classical, Rock, Pop, Blues, Jazz, Country, Funk, Metal, Folk, Rock ‘n’ Roll, etc. There are many different styles of playing guitar and all these styles can be played on any type of guitar. All guitars have six strings and are tuned the same. For example, you would usually play lead on an electric guitar but you could play lead on a classical guitar or you could play fingerpicking style on an electric guitar. It all depends upon the sound you are looking for.
1. Rhythm Guitar
Used to accompany a lead instrument (e.g., melody sung by a vocalist). The left hand holds a chord shape (a group of notes) and the right hand strums the strings with a pick. You will learn the basics of rhythm guitar in this book. To learn how to play more chords and rhythms, see Progressive Guitar Method: Rhythm and Progressive Guitar Method: Chords.
2. Lead Guitar
Used to play only one or two notes at a time. It can either be a melody line or an improvised solo. Most lead players use a pick. You will learn the basics of lead guitar in this book. To learn more about how to play lead guitar, see Progressive Guitar Method: Lead.
3. Fingerpicking Guitar
The left hand holds a chord shape and the right hand fingers pick one or two notes at a time with the fingernails. Used to accompany a lead instrument or vocalist. To learn how to play fingerpicking guitar, see Progressive Guitar Method: Fingerpicking.
4. Rock Guitar
Uses both rhythm and lead guitar techniques. Rock music makes use of both open chords and bar chords, along with scales, riffs and improvised solos. Rock is usually played on electric guitars. To learn how to play Rock guitar, see Progressive Beginner Rock Guitar.
5. Blues Guitar
Like Rock, Blues uses elements of both rhythm and lead guitar. Contains many bends, slides and other techniques. Blues also makes use of triplets and swing rhythms. It can be played with a pick or fingerstyle. To learn how to play Blues guitar, see Progressive Beginner Blues Guitar.
Tuning Your Guitar
Before you commence each lesson or practice session you will need to tune your guitar. If your guitar is out of tune everything you play will sound incorrect even though you are holding the correct notes.
If you have an electric guitar you can plug it directly in to the tuner. If you have an acoustic guitar, the tuner should have an inbuilt microphone. There are several types of electronic guitar tuners but most are relatively inexpensive and simple to operate.
Tuning using other methods is difficult for beginning guitarists and it takes many months to master, so we recommend you purchase an electronic tuner, particularly if you do not have a guitar teacher or a friend who can tune it for you. Also if your guitar is way out of tune you can always take it to your local music store so they can tune it for you. Once a guitar has been tuned correctly it should only need minor adjustments before each practice session. To learn to tune the guitar using other methods see Guitar Tuning Methods.
Tuning To The Recording
Another way to tune your guitar is by ear to another guitar that is already in tune. The following six audio tracks contain a recording of the six strings of a guitar that is already in tune. If you know how to do this then you should tune each string of your guitar to each of these notes in turn.
6th String – E Note (Thickest string)
5th String – A Note
4th String – D Note
3rd String – G Note
2nd String – B Note
1st String – E Note (Thinnest string)
How to Hold the Guitar
When playing sitting down:
- Sit up straight on the front part of the chair as shown in the photo.
- Raise your right leg by crossing it over your left leg or by placing your right foot on a footstool (as shown in the photo). Then place your guitar on your right leg.
- The guitar should be close to your body in an upright position with the neck pointing slightly upwards.
The main aim is to be comfortable and have easy access to the guitar fretboard. A music stand will also be helpful.
When playing standing up:
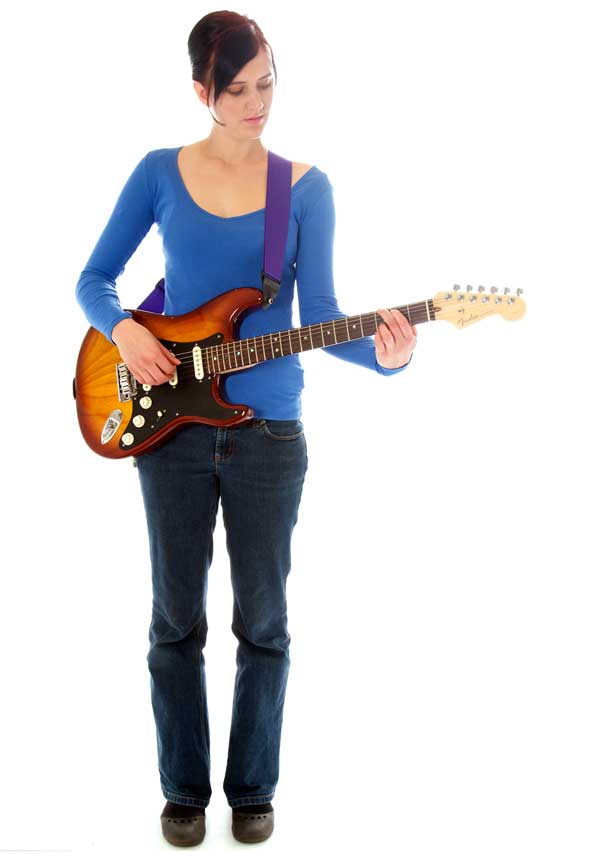
- Use a wide guitar strap and adjust it to a comfortable length. Let the strap take the weight of the guitar. This will keep your hands free to play rather than having to support the instrument.
- Make sure your weight is balanced evenly between both feet.
- The guitar should sit comfortably against your body in an upright position, with the neck pointing slightly upwards.
Right Arm Position
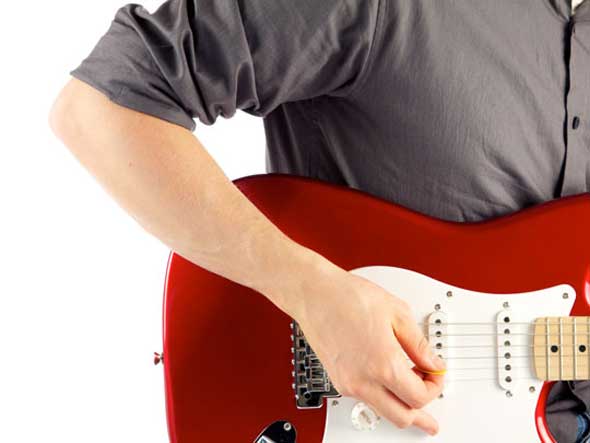
The correct position for the right arm is illustrated in the photos. Notice that the forearm rests on the upper edge of the guitar, just below the elbow. Be careful not to have the elbow hanging over the face of the guitar or your hand too far along the fretboard.
Right Hand Position
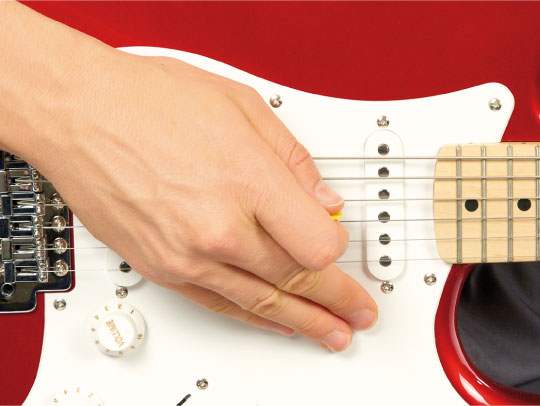
When you are playing single notes, support your right hand by placing the second and third fingers on the body of the guitar. If you are playing an acoustic guitar, pick the strings over the sound hole as this makes the best sound.
If you are strumming a chord, do not support your right hand with your fingers on the body of the guitar but still rest your forearm on the upper edge of the guitar.
Left Hand Position
The correct placement of the left hand is illustrated in photos A and C. Be careful not to allow the thumb to hang too far over the top of the neck (photo B), or to let it run parallel along the back of the neck (photo D).
Chord Diagrams
Chords are learned with the help of a chord diagram. A chord diagram is a grid of horizontal and vertical lines representing the strings and frets of the guitar. This will show you exactly where to place your left hand fingers in order to play a particular chord. The dots show you where to place your left hand fingers and the number tells you which finger to place down on the string just behind the fret (see previous photo). If there is no dot on a string, you play it as an open (not fretted) string.
There are three basic types of chords that you will learn about as you progress – major chords (shown as red dots), minor chords (purple dots) and dominant chords (green dots).
How to Read Music
There are two methods used to write guitar music. First is the traditional music notation method (using music notes,  ) and second is tablature. Both are used in this book but you need only use one of these methods. Most guitarists find tablature easier to read, however, it is very worthwhile to learn to read traditional music notation as well. Nearly all sheet music you buy in a store is written in traditional notation.
Tablature
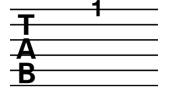
Tablature is a method of indicating the position of notes on the fretboard. There are six “tab” lines each representing one of the six strings of the guitar. Study the following diagram.
When a number is placed on one of the lines, it indicates the fret location of a note, for example:
These notes are known as the musical alphabet and indicate the pitch of the note to be played. Musical notes are written in the spaces and on the lines of the treble staff:
Bar lines are drawn across the staff, which divides the music into sections called bars or measures determined by the time signature. A double bar line signifies the end of an important section of music, while a final bar line is written at the end of a piece.
<< First < Previous | Intro 1 2 3 4 5 | Next > Last >>
Back to Table of Contents


